Brand Central in Microsoft 365 is available in Preview. We can change the ‘Font’ style of a SharePoint site as well as Viva Connections using the Brand Central configuration updates.
I uploaded a few fun fonts. Created a couple of ‘Font-Packages’
Once packages were created they were available to be used in SharePoint site right away!
Enable Brand Central:
- Login to http://www.microsoft365.com (need to be a Global Admin)
- Select Settings in the left navigation panel and then Org Settings, your Brand Central (Preview) will be available to configure

- Once you set it up, you will be provided with Brand Center Site & an App.

- Go to Brand Center Site > Gear Icon on top right > Brand Center (Preview)
- You will now see a section to add your custom fonts https://YOURTENANT.sharepoint.com/sites/brandguide/_layouts/15/brandcenter.aspx/fonts
- Upload your brand fonts

- Back at the Brand Center page, in Apply your brand section > SharePoint – Font packages > Create your font package with these custom fonts

- When you create the font package, you will also have to select the font for Title, Headline, Body & Interactive sections

- Thats it! 🙂 You can now use these fonts to custom brand your SharePoint site typography!
- Go to the SharePoint site where you want to update the fonts. Gear Icon on the top right > Change the look > Font (preview) > Select the font package you created in step 8


Viva Connections
- Open your Viva Connections page
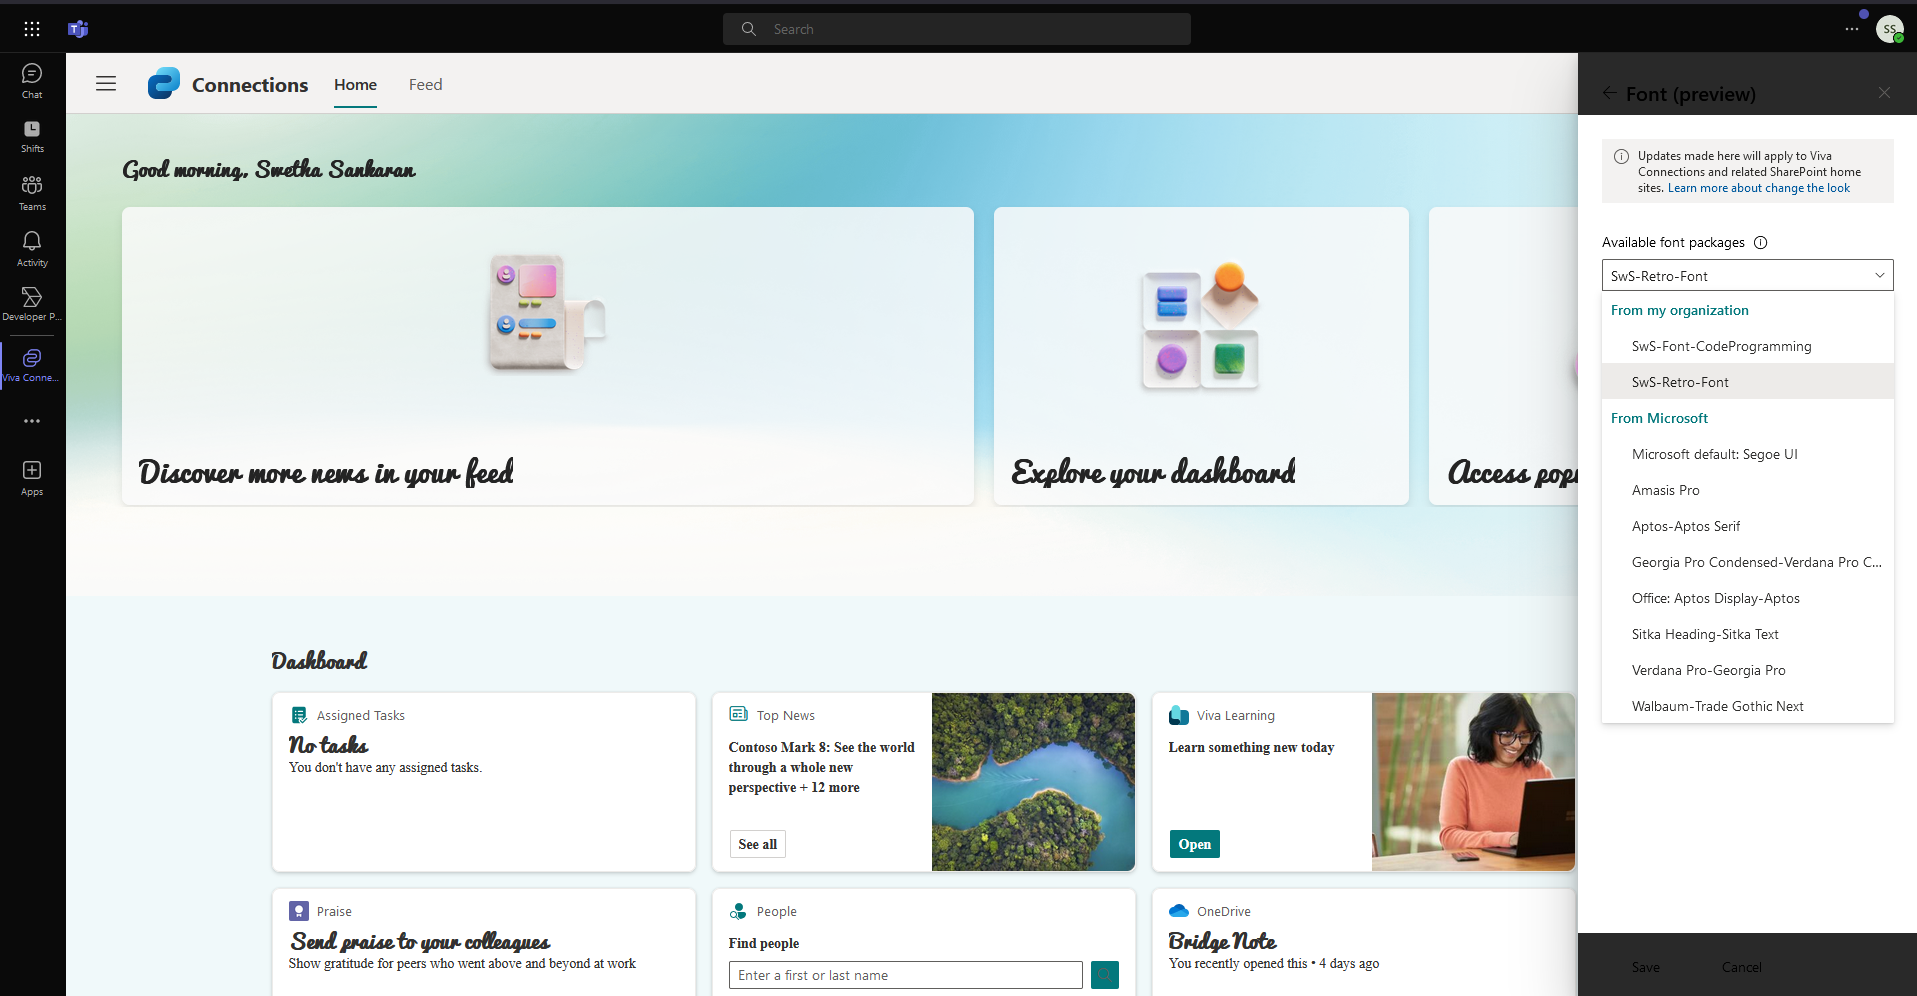
- Click on the three vertical dots to the right of Viva Home ‘VH’ > Select Change the look > Font(preview) > Select Custom Font Package


- And save! Custom fonts updated in Viva Connections page!


This was fun! Check-out the video as well!
M365 Brand Central – Fonts by Swetha Sankaran
Discover more from QubitSage Chronicles
Subscribe to get the latest posts sent to your email.